SPEC SP44S FLYWHEEL SENSOR INTERFERENCE FIXIt was recently brought to our attention that there may be a signal interference issue with the crankshaft flywheel sensor on a 944 Turbo if using the SPEC SP44S Steel Scalloped Flywheel in some instances.It seems to not be on every car with this flywheel. Aside from using a oscilloscope to read the wave pattern from the sensor so see if it is a clean square wave, the other indication may be that the car after installing the flywheel has some change in how smooth the car idles or how it performs overall. If no running conditions changed, then you're probably one of the ones who has a car that doesn't care. For the others, we have came up with a simple repair or fix for the condition. The problem stems from the OD of the flywheel being about 1/8" larger in diameter then the stock flywheel. This also means the sensor is also about 1/16" closer to the steel flywheel. The sensor being closer to the steel flywheel seems to be causing the issue. The goal of this fix is to move the sensor back away from the flywheel to near the stock distance or gap. If you're certain your sensors are gapped correctly, then this procedure will not require you to check the gaps again. If they are not, then after you do the procedure, you would want to check the gap and adjust accordingly to achieve .8mm (0.030") air gaps. Bellow is the SPEC SP44S Steel Scalloped flywheel first released in May 2011. Flywheels produced after May 1, 2017 have a smaller stock flywheel diameter and this will not apply to you. 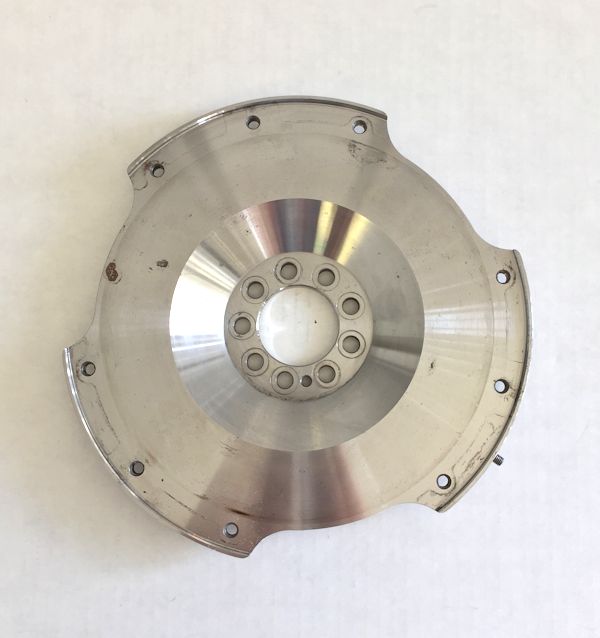 Pictured below is the crankshaft sensor mounting bracket which is attached by two bolts to the back of the engine. DO NOT loosen to mounting bolts on the bracket to the engine.There are two sensors in the bracket. We are only concerned about the forward located or flywheel sensor in position B marked on the bracket. Once the sensor is removed, you need to remove the sleeve from the bracket. 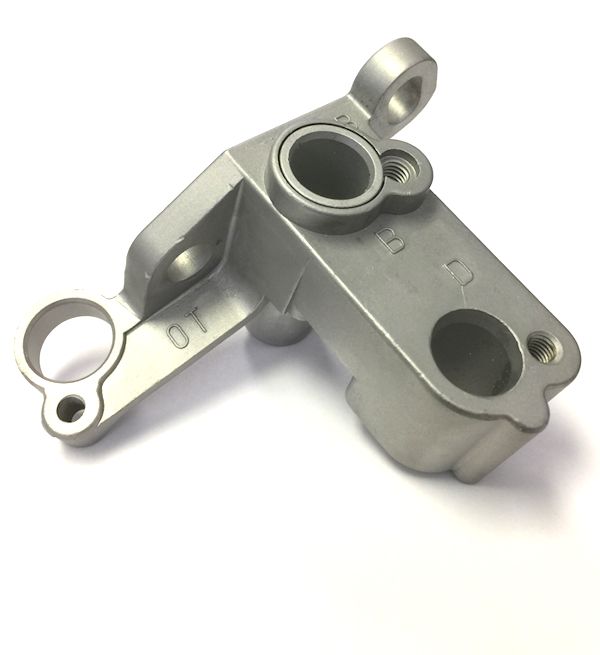 You will need to remove about 2mm of material from the bottom of the sleeve. If you remove material to where the bevel or taper ends (see marked with red lines), then that's good enough. You may wish to sand of grind a new bevel on the bottom of the new length. This is just for the purpose of alignment to make sliding into the bore of the mounting bracket easier so you could skip that step. 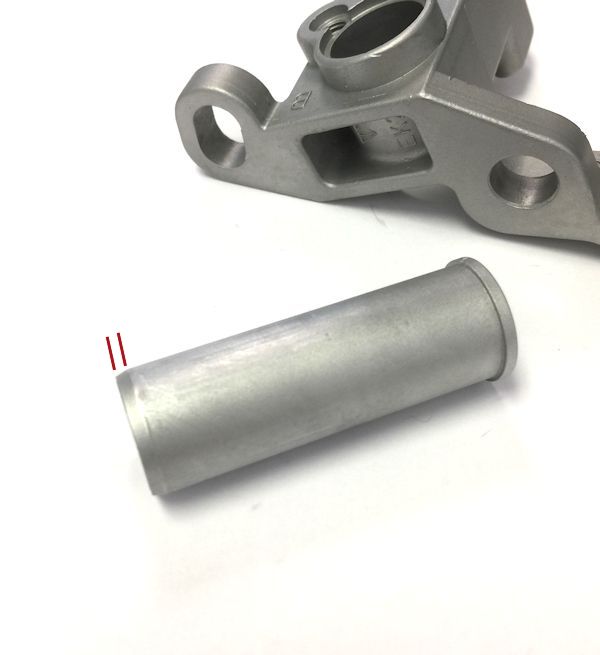 Once the sensor sleeve is re-installed all the way down, we are going to use the 2mm thick hourglass washer (Porsche Part #951-101-325-00)under the sensor just like it is done on the rear sensor. It's the exact same part we are using here to raise the sensor. If you use some other washer, and the thickness is not 2mm, then you will need to adjust for that. 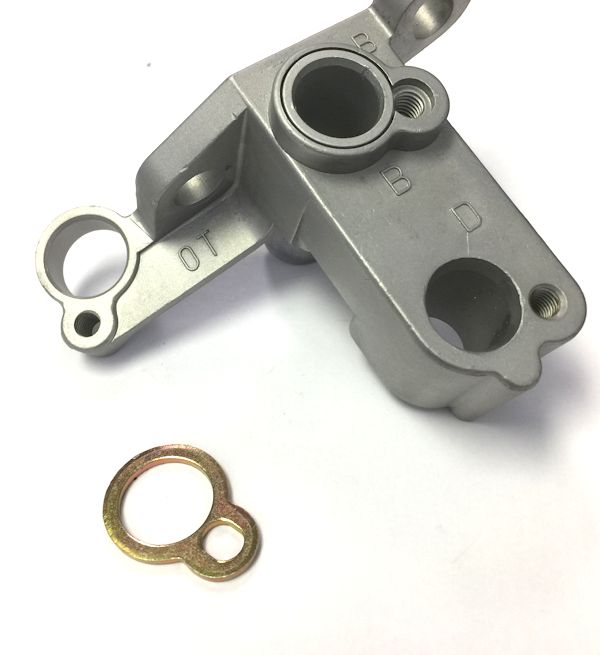 This is how the 2mm washer is will be positioned before you re-install the sensor and attach with the hold down bolt after you make the screw adjustment described below. 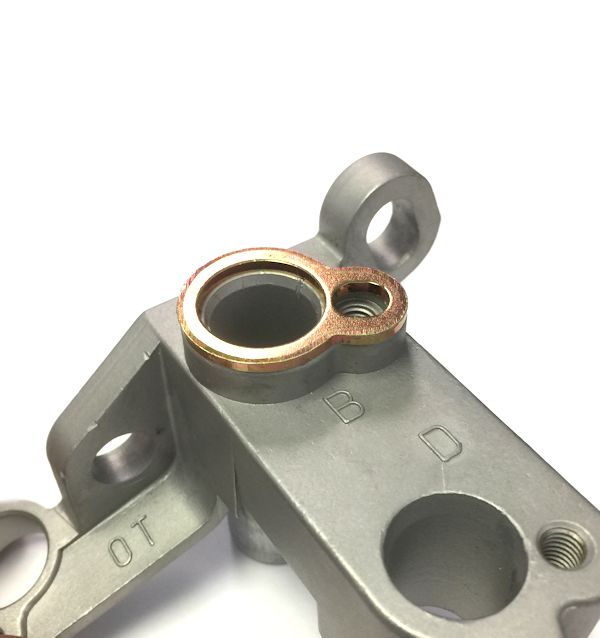 So what we are achieving here is we are spacing the sensor up and away from the flywheel 2mm. Now it's time to re-adjust the sensor screw on the flywheel. Since the sensor screw is a M6 x 1.0 screw, that means it has a thread pitch of 1.0mm. So if we unscrew (Counter Clock Wise) the sensor screw TWO turns, we will increase it's height by 2mm to equal the same distance we moved the sensor out. 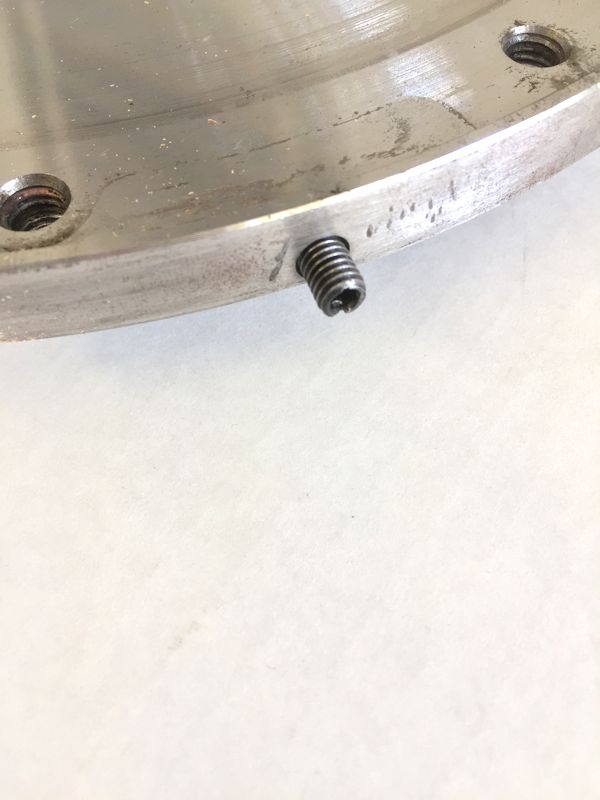 You will need to drip some red Loc-Tite on the screws threads once you have it in the new position and allow it to set up and dry. You can use something like a long thin screwdriver with a drop or two on the end to reach down the hole and apply to the screw so it can run down and into the flywheel around the screw. Re-install the sensor, tighten down the sensor hold down bolt, plug back in if you unplugged it, and you're good to go (once the Loc-Tite sets up of course) |
Secure Checkout


